How to Become the Best RV Travel Planner
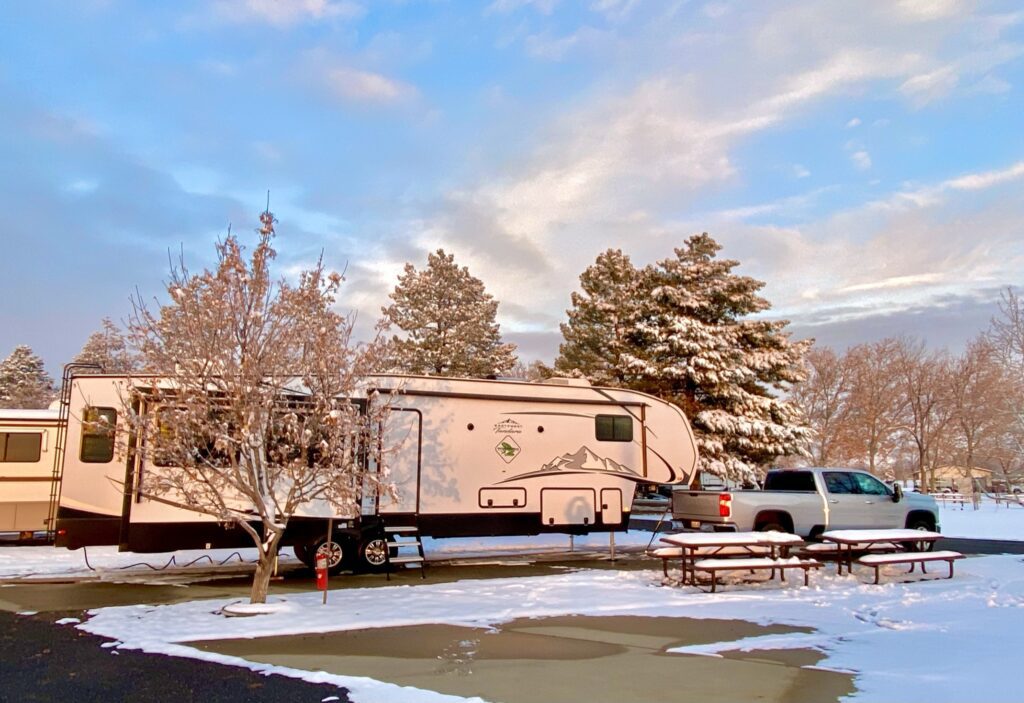
Whether you RV full time, are a weekend warrior, or a free spirit that goes with the wind, at some point you are doing some planning. We’ve been full-time RVing for over 2 ½ years and have learned a lot about what works and what doesn’t. From planning strategies to apps, to programs, to campground memberships, we’ve learned a lot about being great RV travel planners. There are no guarantees, but in all of our time out on the road we’ve never rolled in somewhere with no place to park. We’re going to break down RV travel planning, walk you through how we plan a trip, the tools we use, and how to use them, to help you become the best RV travel planner.
What is the Best RV Travel Planner?
This is the person, or people, who know how they want to RV travel and make it happen. Again, it doesn’t matter if you are full-time and plan every step, are a weekend warrior that plans a few weeks out, or a free spirit that just rolls down the road and finds a spot anywhere. Are you a RV camper or an RV Glamper? Are you a boondocker, or do you need access to full hookups? Don’t get glamping confused with just those that need hookups! There are plenty of glampers who boondock. Getting confused yet? Good, because it’s impossible to define every type of camper for you. YOU need to figure out how you want to RV! We’ve been on the road since May 2019 and have learned a lot since that first trip.
Read more about our first RV trip HERE!
This is the most important part of being the best RV Travel Planner. Knowing you and how you want to RV travel. Going out into the world with the intent of boondocking full time and spending thousands on solar and batteries, only to find out you hate it, is a very expensive lesson. Investing a ton of money on campground memberships only to find out that you want to camp away from people is also expensive. You’re going to learn how you want to RV by getting out there and gaining experience. Our goal is to help you be the best RV travel planner for the RVer you are.
How Do You Plan a Successful RV Trip?
Alright, you know what type of RVer you are, now it’s time to plan a successful trip. That comes down to three things: destination, timing, and tools.
Destination: Knowing Where You Want to Go
You go on an RV trip to get somewhere. Maybe that’s a nearby campground or a family event, or to hit up that major bucket list location. We break our destinations down into three categories: the Big Destinations, the Bonus Stops, and layovers (what we call Lily Pads). In between all of those destinations are the fuel-ups, oddities, and other stops we make. Some people will plan out every one of those (we’ll talk about how you can do that in a minute) but we generally plan the three categories and also the big fuel stations. Why? We have a large RV and it won’t fit into regular gas stations!
Timing: When to Plan
Timing is critical to a successful trip. Everyone wants to go to Alaska, but you don’t plan that drive for winter. Everyone wants to go to the Florida Keys, but if you don’t plan that months in advance your chances are slim to none. Or maybe you have that one perfect RV site you go to every summer…and everyone else wants it too. If you wait too long you’re going to miss out.
Our recommendation here is to plan in advance! How far out in advance do you plan? We generally plan about 6-months in advance. This is for multiple reasons. Most of our big destinations are for family events that we know of far in advance, or due to specific seasons we want to be in a location (i.e. the Florida Keys). Partially because finding great RV sites at the last minute is stressful and sometimes impossible…especially since we have a “big rig”. And then there’s the fact that we’re just straight-up planners. Remember that part about knowing what type of RVer you are? Yep, we’re planners…and kinda glampers. We’re Plampers!
Tools: The Apps, Programs & Memeberships to Help You Plan
There are a lot of tools, apps, programs, and memberships out there. We’ve tried many of them and have figured out the ones that work for us. Here’s a list of what we use in our planning process. We’ve added a few that we used in the past that may work for you.
1. RV Trip Wizard: This is hands down the best overall RV trip planning tool out there. We’ve tried a few others and just struggled. RV Trip Wizard is very powerful and can help you plan anything from an overnight outing to a months-long trip with every stop included (fuel, groceries, doctor’s offices, gyms, and a LOT more). Worried about weather, wildfires, wind, or even road grades? There are layers to help you account for all of it.
RV Trip Wizard is a part of the RV Life Pro Membership. It connects to the RV Life app so you can pull the trip up on your phone and have an RV-safe GPS route. There are a lot of other RV apps and programs included in RV Life Pro and it just continues to grow and get better. What does RV Life Pro offer? It helps you find campgrounds, plan an entire trip, and to navigate routes with RV Safe GPS. It can also help you maintain your RV with Maintain My RV. RV Life Pro is used by over 1.4-million people, has information on over 20,000 campgrounds, contains over 375,000 reviews, tips for over 70,000 locations, and includes multiple RV forums with over 1.5-million discussions. Don’t have a membership? You can save 25% by using code HINTONTHETRAIL at checkout!!

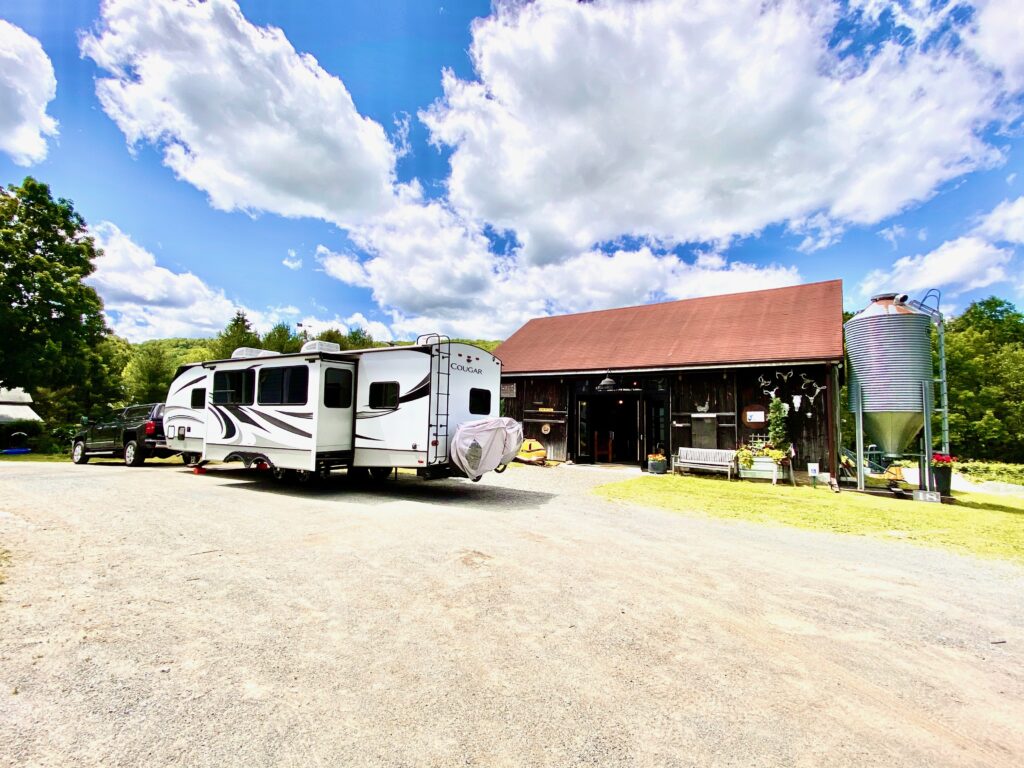
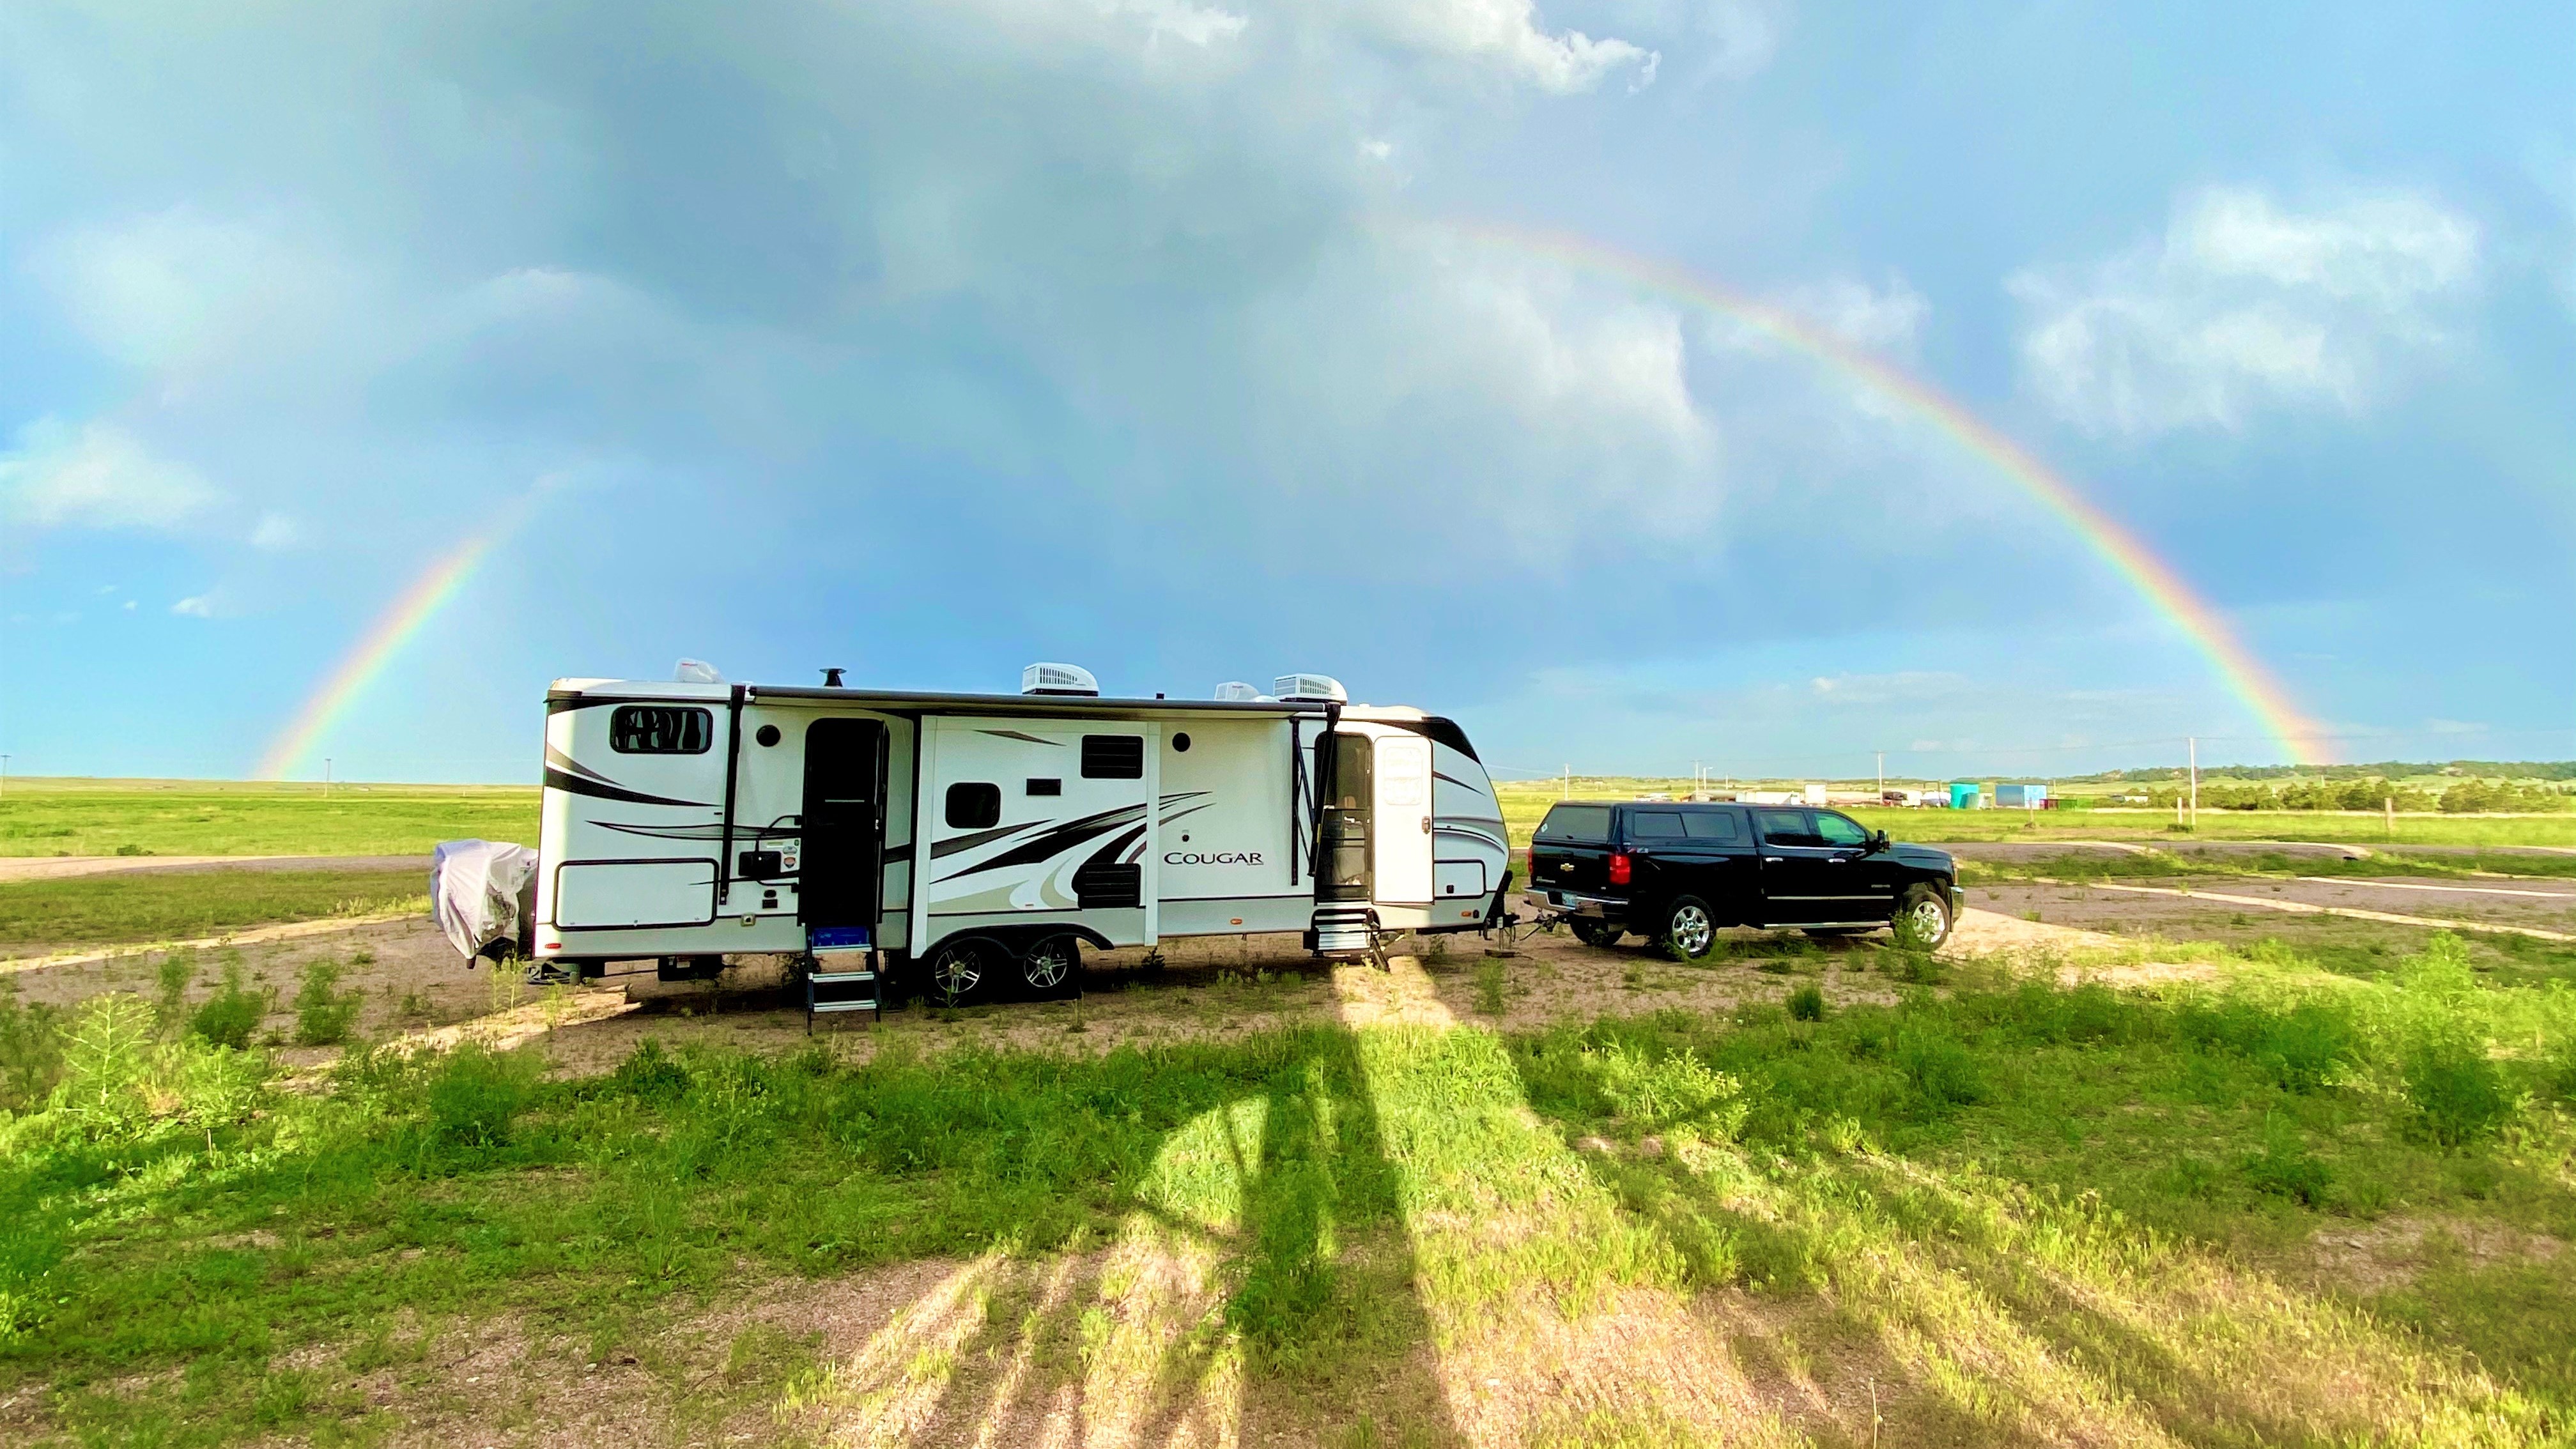
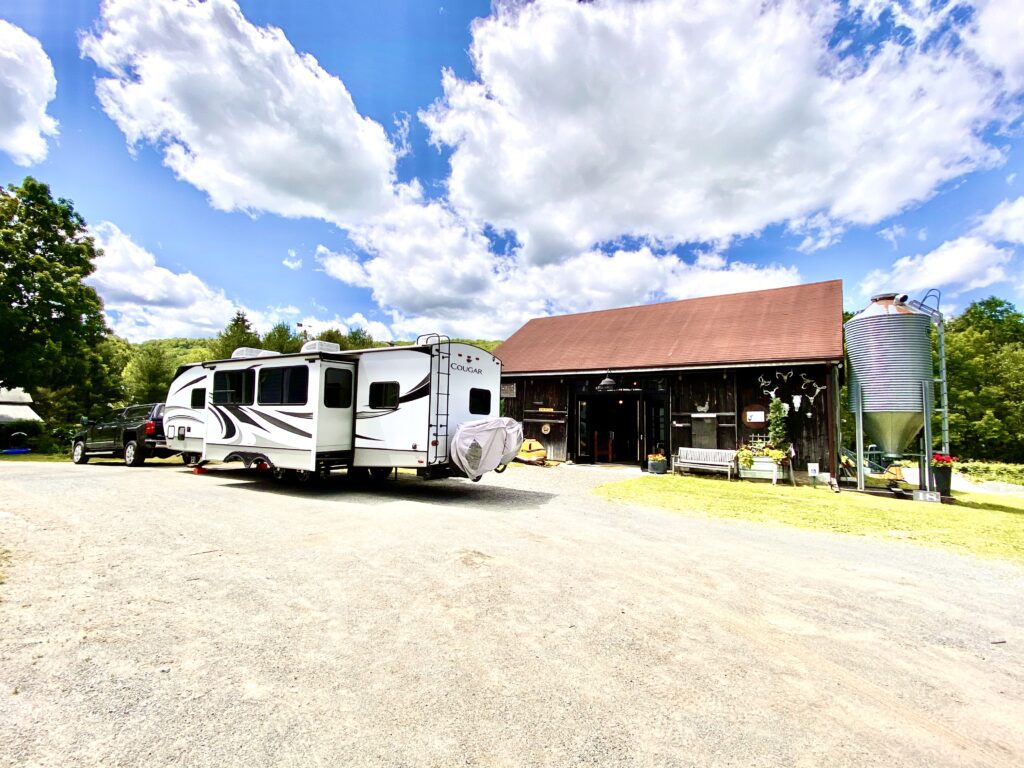
2. Harvest Hosts: Harvest Hosts gives you access to over 2,400 unique locations: wineries, vineyards, museums, etc. If you get the golf package you get access to another 400+ sites. It’s an annual membership and you’re just asked to spend a small amount at the locations you stay at, generally $20. Harvest Hosts are great places for one-night layovers (Lily Pads) whether you’re on your way to bigger things, or just want to experience some very unique stays. We’ve stayed at quite a few and you can see our Lily Pads HERE. The website and app have a great route planning tool as well. More to come on that. If you don’t have a membership, you can save 15% by using our LINK and entering code HHFRIENDS15 at checkout.

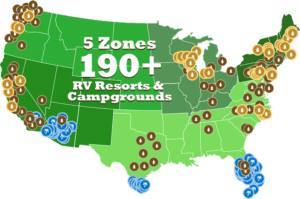
3. Thousand Trails: This is a membership that gives you access to over 190 RV parks across America. There are a lot of different plans that you can get with Thousand Trails but we’re not going to get into them in this blog. We’re sharing it because we use it as part of our planning process. You can learn more about Thousand Trails HERE.
4. Good Sam: This is another membership that can save you money at 2,100 parks around the U.S. and Canada. We received a three-year membership when we purchased our second RV from Camping World so we use it. It saves us 10% at participating campgrounds and gives you discounts at all Camping World and Gander Mountain Stores.
5. Passport America: This is a discount membership program that you pay an annual fee to save money at over 1,400 parks. We found it challenging to work with at some parks. They didn’t offer the discount on full stays, or you had to wait until check-in to verify. We generally save 10% at all locations with our military discount and after looking at the numbers for our first year it just didn’t make sense to renew our Passport America account. We also found that we weren’t staying at a lot of Passport America Parks. Still, it may work for you.
6/7. Campendium & Allstays: Free apps with paid options to get reviews, campground information, and more. In the past, we both apps when searching for parks and would match up reviews before making reservations. Now we pretty much go with the information on RV Life Pro’s Campground Reviews site.
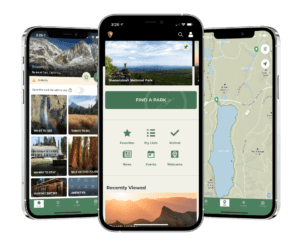
8. National Park System (NPS) App: This free tool is an amazing way to see all of the National Parks, Monuments, and more that are available. You can search nearby or search for a specific location. Download our FREE National Park Guide for more tips and tricks to visiting national parks and monuments.

Find out what to bring on your First RV Trip HERE!
Our Process
We pick the Big Destination, the end goal for our trip. If there’s an event we’re attending we look at that spot first to see if there’s RV camping. If not then we pull up RV Trip Wizard and see what’s available (we’ll go into RV Trip Wizard and the RV Life Pro basics in the next section). We also pull up the Thousand Trails website to match the area and see if there are any Thousand Trails, Resorts Parks International, or Encore parks in that area. If we can stay in that location and do it with savings then we go for it.
Whether it’s a Thousand Trails or not, we look at the reviews of the park on RV Trip Wizard. This powerful tool will give you an overall review of the park, its amenities, the size of RVs allowed, and more. And if you want to dig deeper just click on the Campground Reviews button. This will take you to the Campground Reviews website where there are over 375,000 reviews!
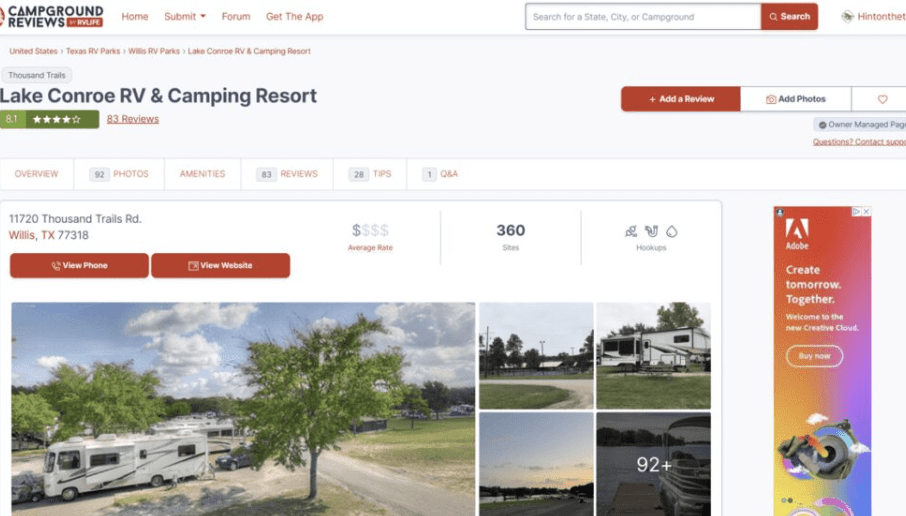
TIP: Look at reviews for the last few months and then skip to a year ago. This will show you if there has been a positive or negative change.
Once you’ve found a park, book it! You can’t book through RV Trip Wizard but it will give you all the contact information. Here’s another tip. Many RV parks partner with a booking company and that company charges a few extra dollars per night. Check the rates on the website and if they don’t match up with the rates you’re getting when you go to book, chances are it’s a third party. Call to book!
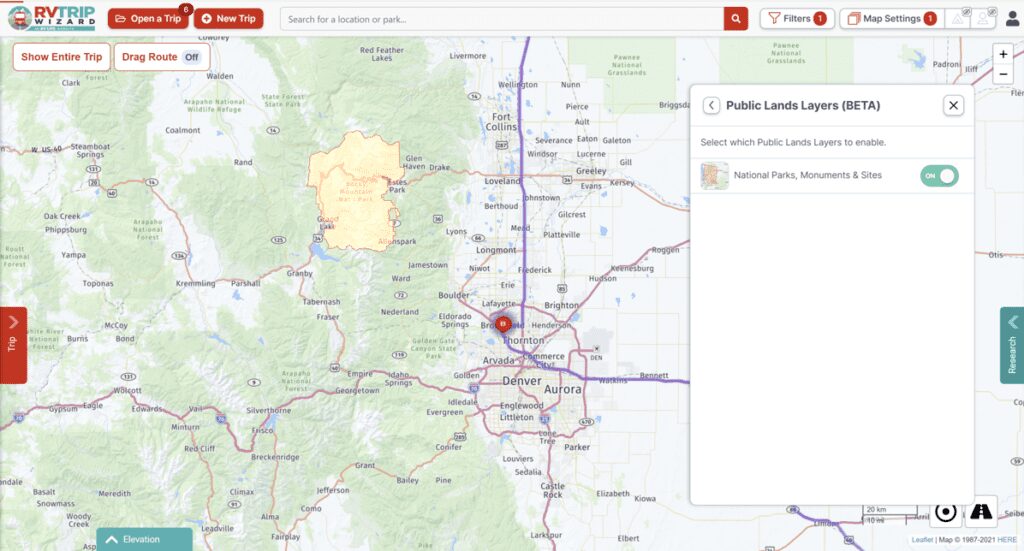
Now that you have a starting and ending point for your trip it’s time to fill in the rest. RV Trip Wizard will show you the route. Our next step is to search along that route to see what sites are close by if we adjust slightly. These become our Bonus Stops. The RV Trip Wizard program has a layer for Public Lands and we use our NPS app to search as well. We’d gladly add a little time and miles if there’s a national park, monument, or some other big site on the way. Then we decide how long we want to stay in those locations. We’ve learned through trial and error that a week is a good timeframe. It saves money (weekly rates generally always save $$), gives you time to explore, time to work, and time to relax. Once we find our Bonus Stops we call and book. Then we review how much time we have and the mileage. We may be able to add some more Bonus Stops or we may need to look at a few back-to-back layovers (Lily Pads) to connect destinations.
Here’s where we pull up our Harvest Hosts membership and start searching. If we can make our Lily Pad a unique stay at a vineyard, museum, distillery, or another cool place then that just adds to the adventure. We’ll go into route planning on Harvest Hosts in the next section but in some cases, you’re able to request a site on the Harvest Hosts website, or you just need to call. Pro Tip here, don’t wait too long! They don’t generally allow you to book 6-months out so we’ll put a place marker on our RV Trip Wizard and mark our calendar for when to book. Learn more about Harvest Host stays in our blog HERE.
That’s our process. Find the Big Destinations, next pick out your Bonus Stops, and connect them with Lily Pads.
Read more about amazing Harvest Hosts destinations in our BLOG!
How to RV Travel Plan
Using RV Trip Wizard & RV Life Pro
RV Trip Wizard is a part of RV Life Pro and is a web-based program. While you can access RV Trip Wizard from your phone we recommend you do it from your laptop or desktop. If you don’t have a membership you can save 25% by using discount code HINTONTHETRAIL at checkout. They offer a 7-day free trial so you have some time to get in and try everything out. The RV Trip Wizard program is very powerful and has a LOT of different tools.
We’re going to run over the basics so you can set yourself up for success. The first of these is to build your settings. This is critical so the program can take into account how you like to RV, your RV specifications, and more. Inputting your settings will ensure that the trip is built for YOU. Again, it’s important to know how you like to RV.
Settings:
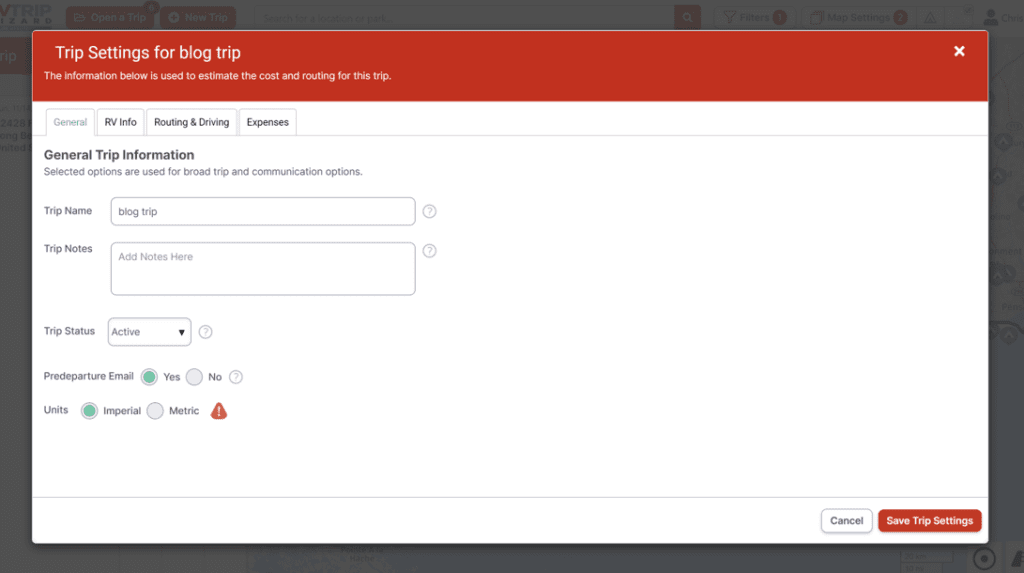
Log into RV Trip Wizard, click on your name on the right-hand side, and then select “Default Settings”. Input your General preferences (units are probably the most important) and then move over to “RV Info”. RV Info is critical to the routing because the program will take into account your height and length when looking at bridges, overpasses, etc. It will also take into account the weight for bridges. Your fuel mileage is important as well because the program will create fuel alerts based on mileage so you know when you’ll need fuel along your route.
Next, click on “Routing & Driving” and select your preferences. A note here, the average MPH is based on all driving, stops, etc. Just because the road is 65 doesn’t mean that’s what you’ll average. A good rule of thumb here is to set the average speed to 55. And finally, input your driving distances. The system will build your radius based on how many hours and how many miles you prefer to go. We set ours to 5 hours and a maximum distance of 250 miles.
You can go in and enter expenses and your memberships and preferences at this point. RV Trip Wizard will allow you to focus on preferred campgrounds if you select them. After you’ve updated all of the settings select “Save Default Settings” and it’s time to build a trip and use your RV planning skills.
Building a New Trip:
From the home screen you’ll need to select “New Trip”, input a name, and if you know the starting date input it, and then select “Create”. Next, you’ll be able to choose your starting location. RV Trip Wizard now gives you a chance to update your settings in case you didn’t build them initially, or in case you’re using a different RV. If you want to be able to utilize the trip in the RV Life Pro RV Safe GPS you MUST set “Trip Status” to “Active”. Review the settings and select “Save Trip Settings”.

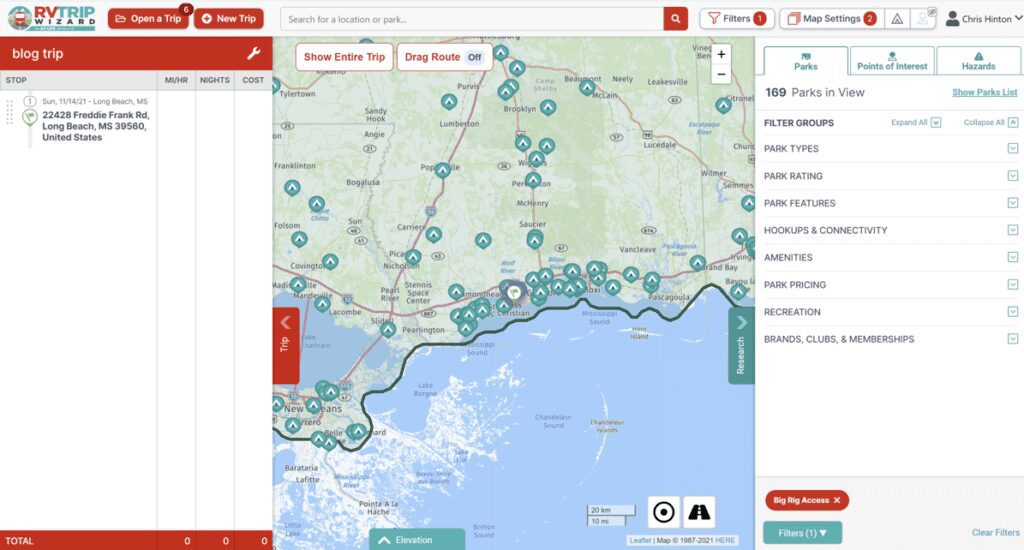
You can build your trip chronologically or input the final destination and work backward. That’s what we do because it gives us the overall picture. In the “search for location or park” block type in your destination and hit enter. RV Trip Wizard will move the map to that location. If you don’t see any campground icons then click on the “tent” icon on the top right of the program. This will bring up all campgrounds in that area. All of them! It’s VERY helpful to filter things down to ensure you get the campgrounds that meet your needs. Again, it’s important to know the type of RVer you are and what you want so you can be the best RV Trip Planner.
Select the “Filters” icon and then work your way through the different Groups. We stick with ratings above three stars and the park feature of big rig access. This will allow RV Trip Wizard to show us all parks with these two preferences as a minimum. We may be okay without full hookups if the location is great. If you are too restrictive on your filters don’t be surprised if there aren’t many options.
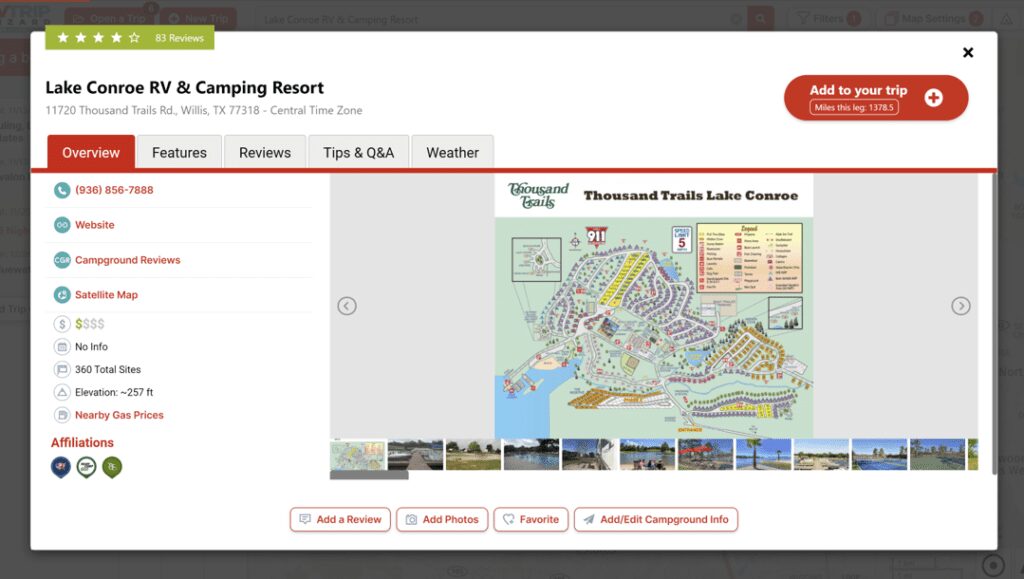
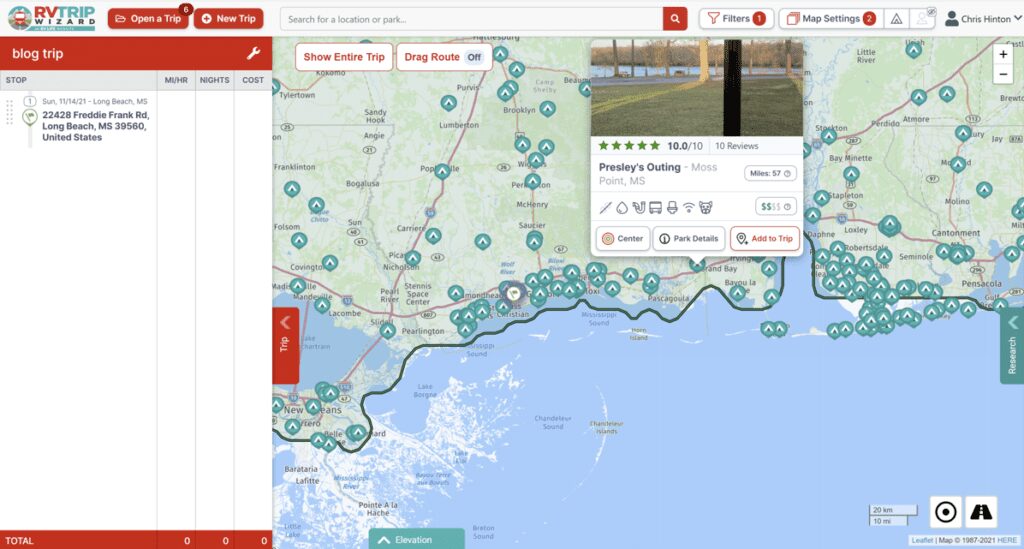
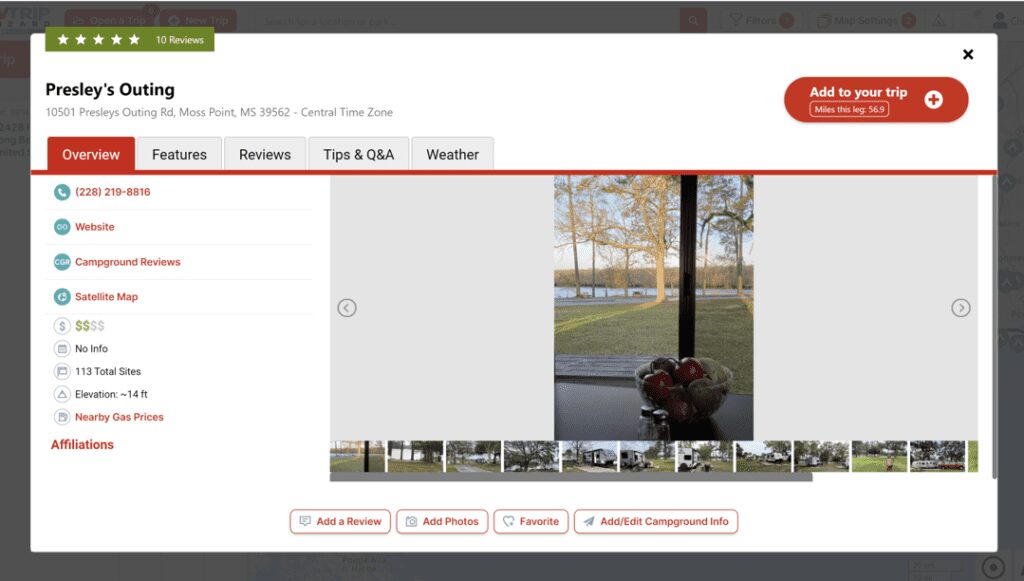
Now that your filters are in place you can start searching for that all-important campground. Simply select a campground icon and you’ll get a popup with basic information (name, rating, amenities, etc.). Then select “Park Details” to get the website, phone number, features, reviews, tips, even weather! You can’t book your site from RV Trip Wizard but it gives you everything you need to make a choice and then contact them.
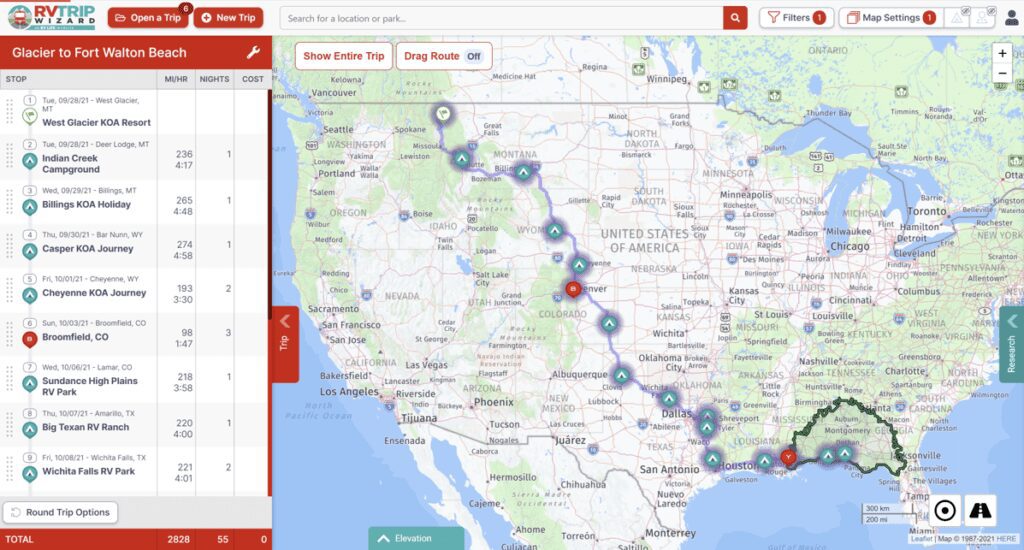
Once you’ve decided on a campground, select “Add to Your Trip” and a new box will pop up. If you know the exact day you want to arrive then move the “Lock Date of Stay” slider over and input the date. This is an important step if you’re working backward on your route. Once you save it, RV Trip Wizard will show your itinerary along with the number of nights available!
Now select “Show Entire Trip” and RV Trip Wizard will show you an RV Friendly route. This again is based on the information you input into your settings. The program is only as good as the information you input so if your RV height, length, and weight aren’t in the system it can’t create a personalized route for you. Don’t rip the top off of your RV because you didn’t take 10-seconds to input your RV height!! That’s not being the best RV Trip Planner.
At this point, you’re ready to start finding your Bonus Stops. Left-click on your starting location and then select the “Show Entire Trip” again. You’ll see a radius on the map. This radius is how far you can travel, and every park that’s within range, for the travel preferences you’ve selected. We look at the route we’re going and the campgrounds near the edge of the radius to find our next stop.
Once you’ve found a campground simply select “Add to Trip” and enter the number of nights you’ll be staying. In the “Add This Stop After” box select the previous location, and then select “Add to Your Trip”. RV Trip Wizard will update your itinerary, including the number of nights you have available on your trip. Continue through this process until your trip is complete.
Review Details and Add to Trip
This covers all RV campgrounds but RV Trip Wizard has the option to add stops for fuel, groceries, roadside attractions, and just about anything else you can think of. You can utilize the filter options to select Points of Interest, or you can search for a specific location (Like Harvest Hosts stays) and add it to your trip. The trip is a living document so you can continually make changes and it will update your itinerary accordingly. And all of it will transfer to the RV Life Pro app and allow you to utilize the RV Trip Wizard option to create an RV-safe GPS route. We’ll get into that aspect after talking about the Harvest Hosts RV trip planning.
Read part 2 of our Harvest Host blog HERE!
Harvest Hosts Planning
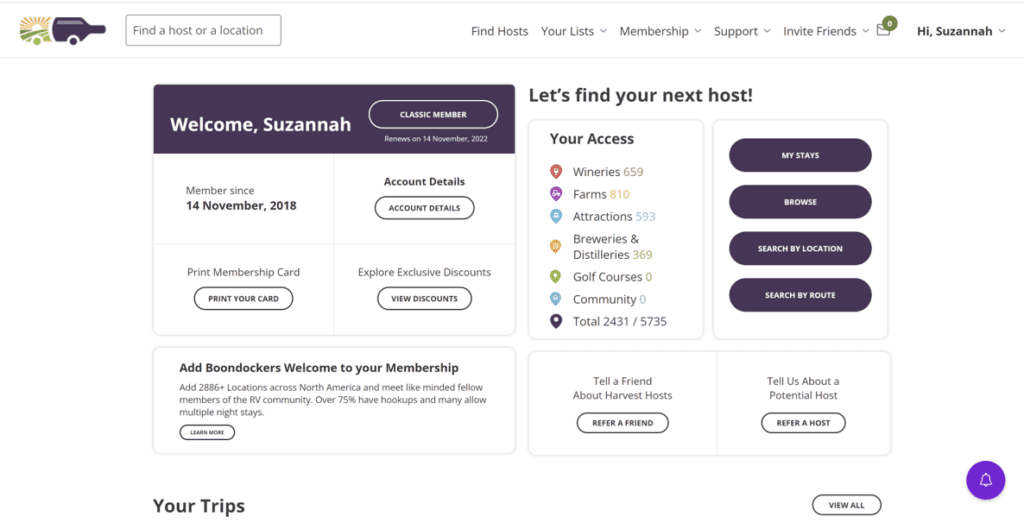
Staying at a Harvest Hosts requires a Harvest Hosts membership. Prices continue to change with the plan as it grows in popularity so get in as early as possible. Regardless, you can save 15% off of your first year if you use our Harvest Hosts Link and use discount code HHFRIENDS15 at checkout. Once you have a membership, simply log in. Read more about Harvest Hosts stays in this blog.
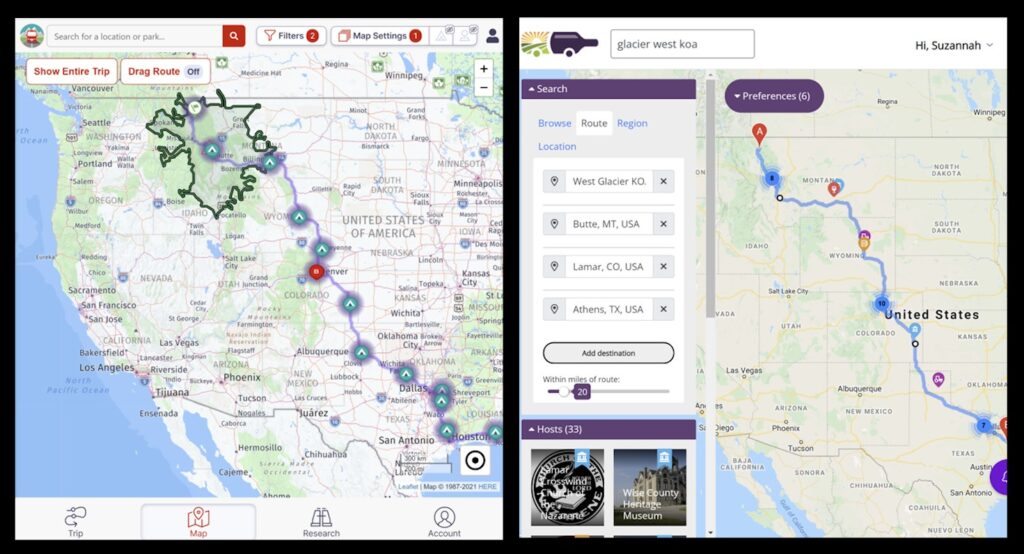
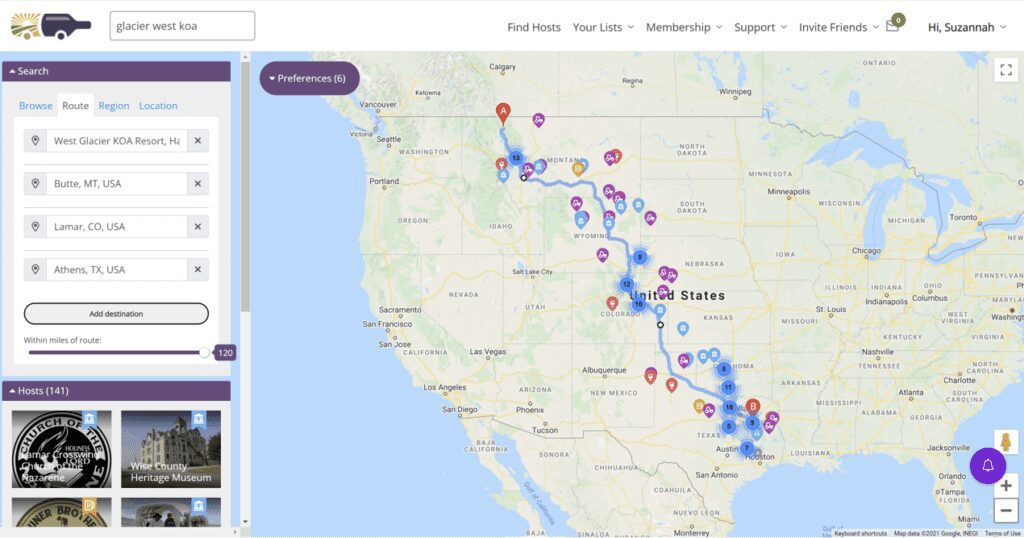
There are multiple options for planning stays: browse, search by location, or search by route. We utilize the “search by route” option because we want to include it in our current itinerary. It’s very simple to do and you’ll quickly find unique stays nearby just about any route you’re taking.
Select “search by route” and once on the page, input your starting and stopping destination. We highly recommend you input a few of the Bonus Stops from RV Trip Wizard into the Harvest Hosts system to ensure you’re on the same route. Simply select “Add Destination” and input a city on the route you’re taking.
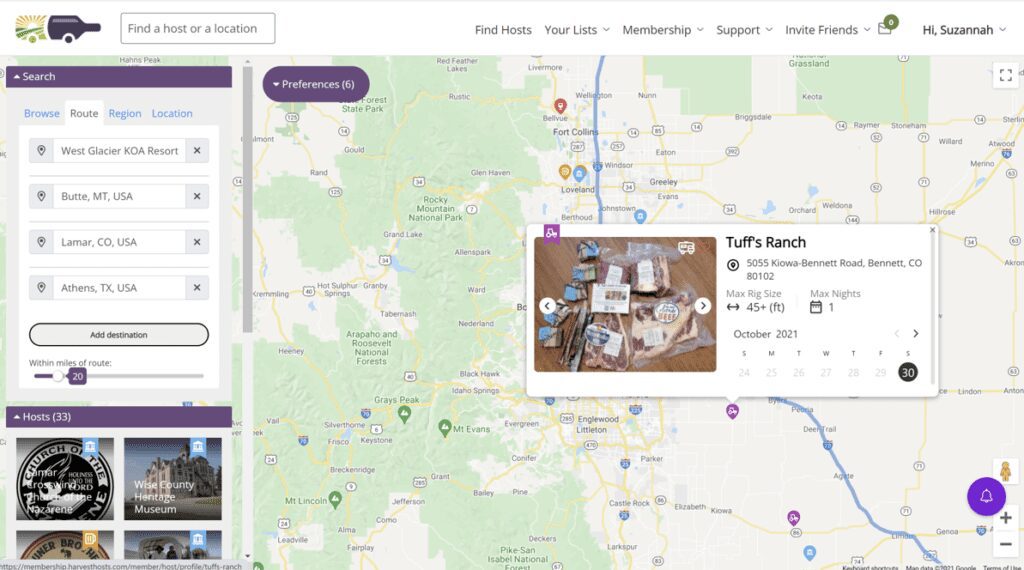
Next, you’ll need to narrow down how far you’re willing to go off of your route to experience one of these unique stays. Simply move the “Within miles of route” slider to the mileage you’re comfortable with. We’ve found that 20-miles is about our maximum. After that, it’s simply finding a spot that fits your needs and wants.
Select one of the icons to find your destination. Wineries, breweries, museums, etc. have unique icons to make it easier for you to find the experience you’re looking for. Selecting an icon will bring up basic information about the location. Probably the most important piece of info is the Max Rig Size. Don’t try to fit into a place that can’t accommodate you! One more click on the information box will take you to that Harvest Hosts page where you can see reviews, photos, amenities, and how to request a stay.
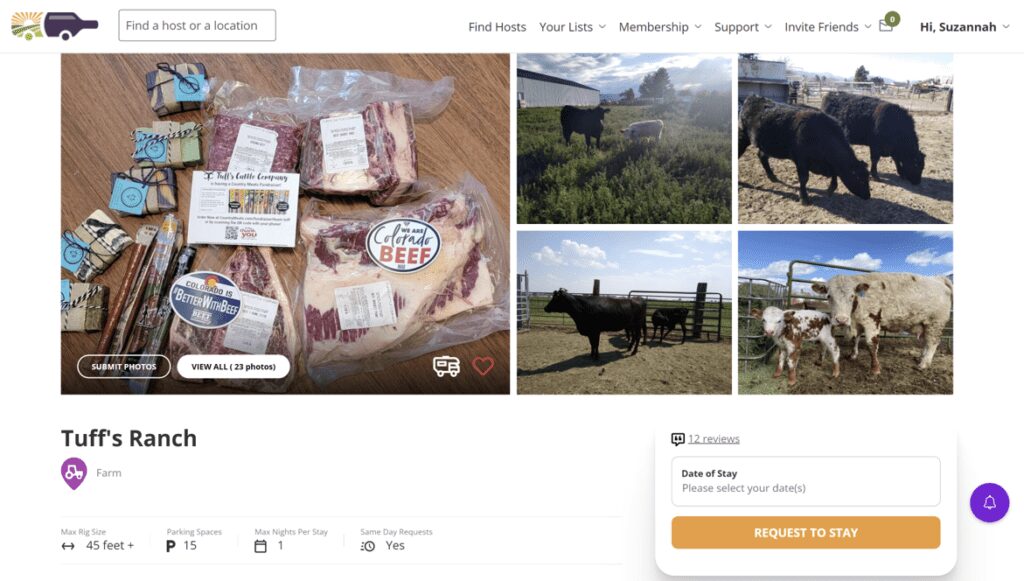
Most Harvest Hosts are currently reserved by phone, but some of them now offer a “Request to Stay” option. Simply input the date you’re looking for and then hit the button. You should receive a reply within a day or two.
A little side note here. Harvest Hosts sites are running a business and allowing RVers to stay at their locations is secondary. Be patient with them and read the information on their page. How we as RVers act in reserving, and during our stay, has a big impact on these Hosts continuing to allow us to stay at their location.
It is also important to note that while you do pay an annual membership fee, don’t forget to support the Harvest Host destination by purchasing a bottle of wine, visiting the museum, or taking a tour of the brewery. They generally ask you to spend $20.
Once you’ve found your Harvest Hosts locations you can go back to RV Trip Wizard and input them into the itinerary. It’s that simple!! So now you have all of your Big Destinations, Bonus Stops, and Lily Pads in your itinerary. Now you’ve finished your RV trip planning and it’s time to hit the road and use the GPS in the RV Life Pro app.
RV Life Pro GPS
When you open your RV Life Pro app on your phone you’ll see a red block at the bottom. Tap on the block and six options will come up. You’ll see the RV Safe GPS which you could use to select a route from your current destination to the next. This is always an option to use if you’re making side trips that weren’t built into RV Trip Wizard and is a great tool. But, you built a trip in RV Trip Wizard and it will create an RV safe route for you.
Select the RV Trip Wizard option, scroll through the trips until you find the one you’re looking for. (Note: if you don’t see the trip you’ll need to go back into RV Trip Wizard and make the trip “active”.) When your trip opens you’ll see the entire itinerary. Select the next destination you’re going to simply by tapping on the direction arrow in the corresponding block.
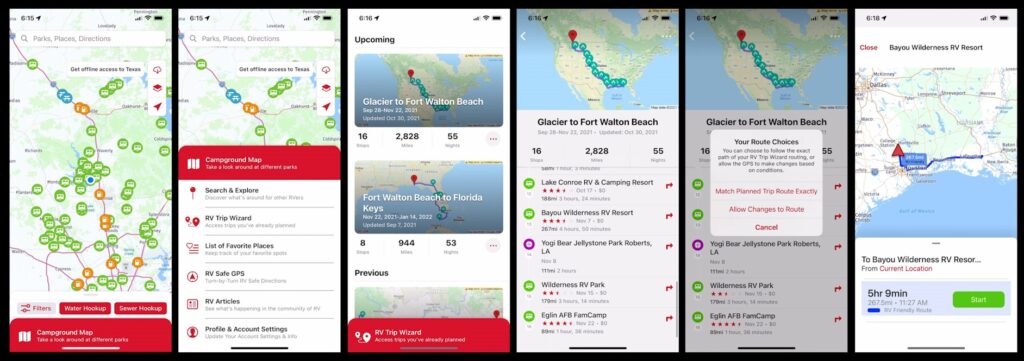
You’ll have the option to allow changes to the route or match the planned trip route exactly. The GPS will recognize construction, delays, and can change the route accordingly. If you don’t want to deviate at all from the route you’ve built then select the “Match Planned Trip Route Exactly” option. The next page may still display route options so select the one that works best for you and hit “Start”. You’re on your way!
A lot of people may ask if RV Life Pro is worth the money and for us it is. We can plan small or large trips. We can make a trip as simple as start to stop, or include every detail along the way. We can plan for just about everything you can imagine by using it. If you’re interested in using the best travel planning tool on the market then you can go HERE and use discount code HINTONTHETRAIL to save 25%.
Need more travel inspiration? Check out our BLOG!
You’re Ready to Be the Best RV Travel Planner
Suzannah and I have been full-time RVing for over two and a half years and we’ve learned a lot about RV trip planning. You now know how to break down RV travel planning, how we plan, the tools we use, and how to use them, and are ready to be your best RV travel planner! We’d love to hear your thoughts or experiences with RV living so shoot us a message. We’re always on the hunt for new ways to make life easier so feel free to share what you use as well. And remember, Life’s an Adventure, Hop On!
This post may contain affiliate links or mention our own products, please check out our disclosure policy here.


Informative things.
Branson Mo Mobile Home Parks
Rv Campgrounds Near Lake Of The Ozarks